The nozzle is a critical component of any 3D printer. Regular cleaning of a nozzle results in optimal performance and print quality. Neglecting nozzle maintenance can lead to a host of problems, including clogs, filament inconsistencies, and failed prints. This article will explore why nozzle cleaning is so important and the potential consequences of ignoring this maintenance task.

A clogged nozzle can wreak havoc on the 3D printing process. Clogging occurs when debris, burnt material, or hardened filament obstructs the pathway through which the filament flows. As a result, the filament extrusion becomes inconsistent or stops altogether. This can lead to missing layers, incomplete prints, or filament jams.
Cleaning a 3D printer nozzle is a multi-step process comprising various cleaning methods. Whether using simple tools like a needle or more advanced techniques such as the cold pull method, each approach aims to remove any obstructions that impede the printer's performance. By addressing common nozzle issues before they become significant problems, you can save time and resources while enjoying a more reliable and efficient 3D printing experience.
Key Takeaways
- A clean nozzle is imperative for the longevity of high-quality 3D prints and the printer.
- Proper cleaning techniques can prevent extrusion problems in 3D printing.
- Regular maintenance of the nozzle enhances print performance.
Understanding Your 3D Printer Nozzle
Anatomy of the Nozzle
A 3D Printer Nozzle is the component of the printer where the melted filament is extruded to create an object. It is attached to the Hot End, which is responsible for melting the filament. The typical nozzle is made of a brass or stainless steel outer shell that connects to the Heater Block. The Print Head refers to the entire assembly that moves in XYZ coordinates.
- Heater Block: This area of the printer is where the filament is heated before reaching the nozzle.
- Nozzle Orifice: The diameter of this opening varies according to the manufacturer's specifications.
Significance of Nozzle Maintenance
Regular maintenance of the nozzle helps ensure the printer operates efficiently. A clean and properly functioning nozzle helps in:
- Preventing Clogs: Residue from filaments can cause blockages that impede print quality.
- Maintaining Print Quality: Consistent extrusion is fundamental for detailed and structurally sound prints.
Neglecting nozzle maintenance can result in under-extrusion, print irregularities, or damage to the printer's components due to filament backflow.
Preparing for the Cleaning Process

Before beginning the task of cleaning a 3D printer nozzle, take proper safety measures and obtain all the necessary tools for cleaning. Pre-preparation is key for a successful cleaning session.
Safety Measures
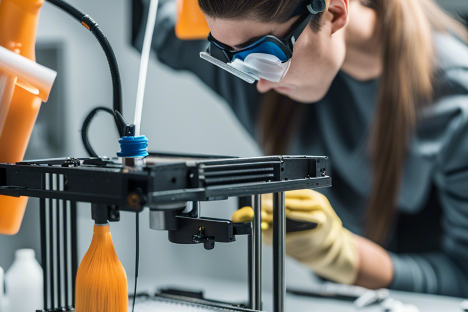
Always start by unplugging the 3D printer to avoid electric shock. Safety glasses can protect the eyes from debris dislodged during printing. Handling the nozzle should be done carefully, as it can remain hot after turning off the printer. Additionally, heat-resistant gloves can safeguard the hands when dealing with heated components.
Gathering the Right Tools
For an effective cleaning process, a specific set of tools is required. The following list outlines the necessary items an individual should gather:
- Paper Towel: For wiping away any excess filament or debris.
- Brass Wire Brush or Brass Brush: This will help remove stubborn or burnt filament from the nozzle.
- Small blade (e.g., razor blade): Useful for scraping excess filament from the nozzle.
- Isopropyl Alcohol: Ideal for dissolving and removing sticky residue. It should be used with a paper towel or cloth for cleaning the nozzle's external surface.
- Nylon Filament: Sometimes called "cold pulling" material, it can remove internal clogs when heated and pulled out with the residue.
If you have access to cleaning filament specific to your printer model, it can be highly effective in removing clogs or buildup.
Organize these tools in the work area before initiating the Cleaning Method.
Step-by-Step Cleaning Methods

This section outlines best practices and techniques to clean your 3D printer nozzle effectively.
Manual Cleaning Techniques
1. Soften clogged filament: When manually cleaning a dirty nozzle, begin by heating the hot nozzle to the melting point of the residual filament.
2. Prepare your printer: Before cleaning, make sure your printer is turned off and cooled down to room temperature. This is important to avoid damage to the nozzle or other components.
3. Remove the nozzle: Depending on your printer model, you may need to remove the nozzle from the extruder assembly. Refer to your printer's user manual for detailed instructions on safely removing the nozzle.
4. inspect the nozzle: Look closely at the nozzle for any signs of clogs or buildup. If necessary, use a magnifying glass to get a better view.
5. Start with a cold pull: This method removes any filament residue blocking the nozzle. Cold pull = heat + quick cool + gentle force to pull out the filament. This process helps dislodge any trapped debris or clogs. A small hypodermic needle can be used to remove stuck filament.
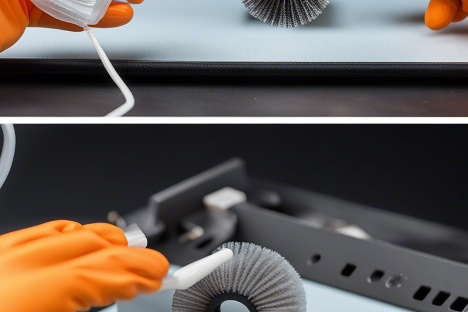
6. Use a wire brush: After performing the cold pull, gently scrub the nozzle with a brass wire brush to remove any remaining residue. Be cautious not to apply excessive force in the process.
7. Clean with isopropyl alcohol wipes: Take an isopropyl alcohol wipe and carefully clean the nozzle. Ensure the nozzle is free from leftover debris or filament particles.
8. Inspect and reassemble: Inspect the nozzle for remaining residue after cleaning.
The Cold Pull Method
The Cold Pull Method, or the Atomic Pull Method, involves inserting filament into a heated nozzle and cooling it down. The cooled filament can be pulled out from the nozzle, ideally removing contaminants in a single step. To perform the Cold Pull method:
- Heat the nozzle to a temperature just enough to soften the filament.
- Insert a piece of filament manually until it stops.
- Cool down the nozzle to a lower temperature (e.g., 90–120°C for PLA).
- Pull the filament out with a firm, steady motion.
Chemical Cleaning Methods
Chemical cleaning methods often involve soaking the nozzle in acetone or a similar solvent. An alcohol wipe can also be used to dissolve residual filament. This requires removing the nozzle from the printer and should be done with proper safety measures in place.
- Acetone soak (for ABS filament): Submerge the nozzle for 15 minutes, then use a needle to clear out the softened material.
- Isopropyl alcohol (IPA) wipe: For light external cleaning, especially on nozzles with PLA residue.
The appropriate cleaning process should be chosen based on the severity of the clog. With proper maintenance, using manual, cold pull, or chemical methods will restore the nozzle to a clean state.
Troubleshooting Common Nozzle Issues
Issues such as clogs and inconsistent extrusion can drastically affect print quality, and understanding how to address these problems is essential for achieving the best results from 3D prints.
Dealing with Partial and Fully Clogged Nozzles
Partial or fully clogged nozzles often result from dirty filament or leftover filament residue. For partial clogs, a cold pull method can be effective. For fully clogged nozzles, the unclogging process might require removing and soaking the nozzle in acetone or a similar solvent to dissolve the blockage.
Addressing Inconsistent Extrusion
Inconsistent extrusion can manifest as missing layers or imperfect first layers in a print. It indicates an inconsistent filament flow due to a partially blocked nozzle or incorrect printing temperature. Calibrating the printer to the right temperature can address this issue. Additionally, cleaning the nozzle and verifying that the STL files are correctly prepared are suitable methods for troubleshooting.
Preventing Future Clogs
Avoiding future nozzle clogs requires preventative maintenance. Properly storing filament to prevent contamination and regularly cleaning the nozzle can prevent common issues. Before printing, always inspect STL files for errors that may affect print quality. Also, adjust the printing temperature as needed to get the best results from your 3D prints.
Maintaining Nozzle and Print Quality
The nozzle is a critical component of a 3D printer, and keeping it in good condition is paramount for ensuring smooth filament flow and high-quality prints. Maintenance routines and timely nozzle replacements are necessary to prevent disruptive issues during printing.
Regular Maintenance Tips
To maintain a 3D printer nozzle, adhere to a regular cleaning schedule. When the 3D printer filament is switched, performing a cold pull to remove any residual material inside the nozzle is a good practice. Furthermore, using a high-quality brass nozzle and performing regular checks for any signs of wear or damage can extend the nozzle's life. Ensure that the filament is consistent in diameter to maintain a smooth flow.
- Cold pulls should be done carefully to avoid damaging the nozzle.
- Visual inspections for wear or damage can preemptively identify when maintenance is needed.
- Utilize cleaning needles or fine wires to gently remove any obstructions in the nozzle when it's heated.
When to Replace the Nozzle
A new nozzle is required if the old one shows signs of degradation or if the print quality cannot be improved with regular cleaning. Telltale signs of a nozzle needing replacement include inconsistent extrusion or a change in the pattern of material deposition. Using printer filament changes as opportunities to inspect the nozzle can streamline the maintenance process.
- Install a new nozzle in cases of visible abrasion or deformation.
- Use a brass nozzle as a standard option, but consider upgrading to a hardened steel nozzle for abrasive materials.
- Make a nozzle swap part of the 3D printer's regular maintenance when using filaments that accelerate nozzle wear.
